» Download this section as PDF (opens in a new tab/window)
Foundation is a Nutanix provided tool leveraged for bootstrapping, imaging and deployment of Nutanix clusters. The imaging process will install the desired version of the AOS software as well as the hypervisor of choice.
By default Nutanix nodes ship with AHV pre-installed, to leverage a different hypervisor type you must use foundation to re-image the nodes with the desired hypervisor. NOTE: Some OEMs will ship directly from the factory with the desired hypervisor.
The figure shows a high level view of the Foundation architecture:
 Foundation - Architecture
As of 4.5, Foundation is built in to the CVMs to simplify configuration. The installer store is a directory for storing uploaded images, these can be used for the initial imaging as well as cluster expansion when imaging is required.
The Foundation Discovery Applet (which can be found HERE) is responsible for discovering nodes and allowing the user to select a node to connect to. Once the user has selected a node to connect to, the applet will proxy localhost:9442 IPv4 to the CVM’s IPv6 link-local address on port 8000.
The figure shows a high level view of the applet architecture:
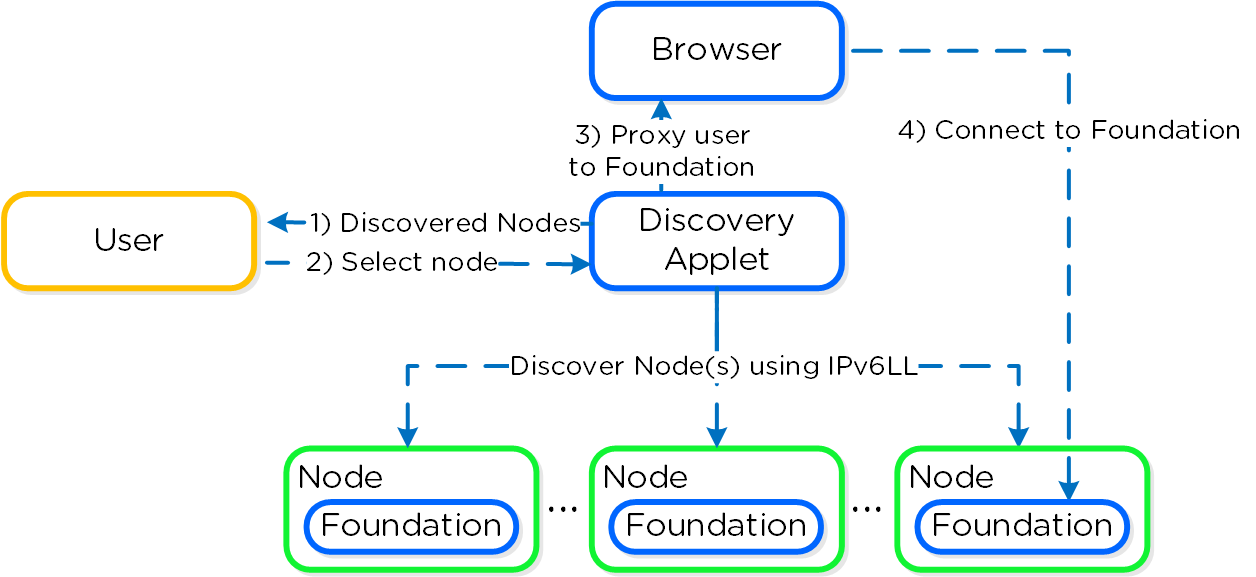 Foundation - Applet Architecture
NOTE: the discovery applet is merely a means of discovery and proxy to the Foundation service which runs on the nodes. All of the imaging and configuration is handled by the Foundation service, not the applet.
If you're on a different network (L2) than your target Nutanix nodes (e.g. over the WAN) you can connect directly to the Foundation service on the CVM if it has an IPv4 address assigned (instead of using the discovery applet).
To directly connect browse to <CVM_IP>:8000/gui/index.html
The Foundation tool has the following configuration inputs (below). A typical deployment requires 3 IP addresses per node (hypervisor, CVM, remote management (e.g. IPMI, iDRAC, etc.)). In addition to the per node addresses, it is recommended to set a Cluster and Data Services IP addresses.
NOTE: Items marked with ‘*’ are optional but highly advisable
The first step is to connect to the Foundation UI which can be done via the discovery applet (if on same L2, node IPs unecessary):
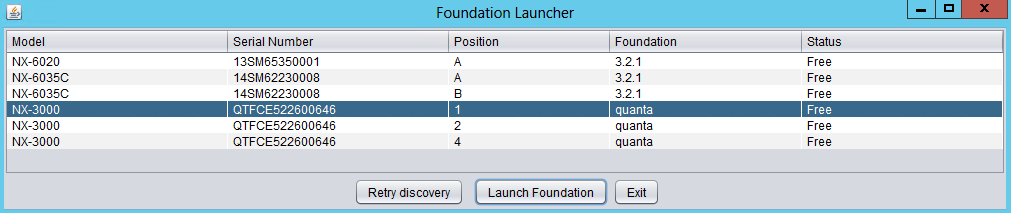 Foundation - Discovery Applet
If you can’t find the desired node, make sure you’re on the same L2 network.
After connecting into the selected node’s Foundation instance the main Foundation UI will appear:
 Foundation - Discovery Page
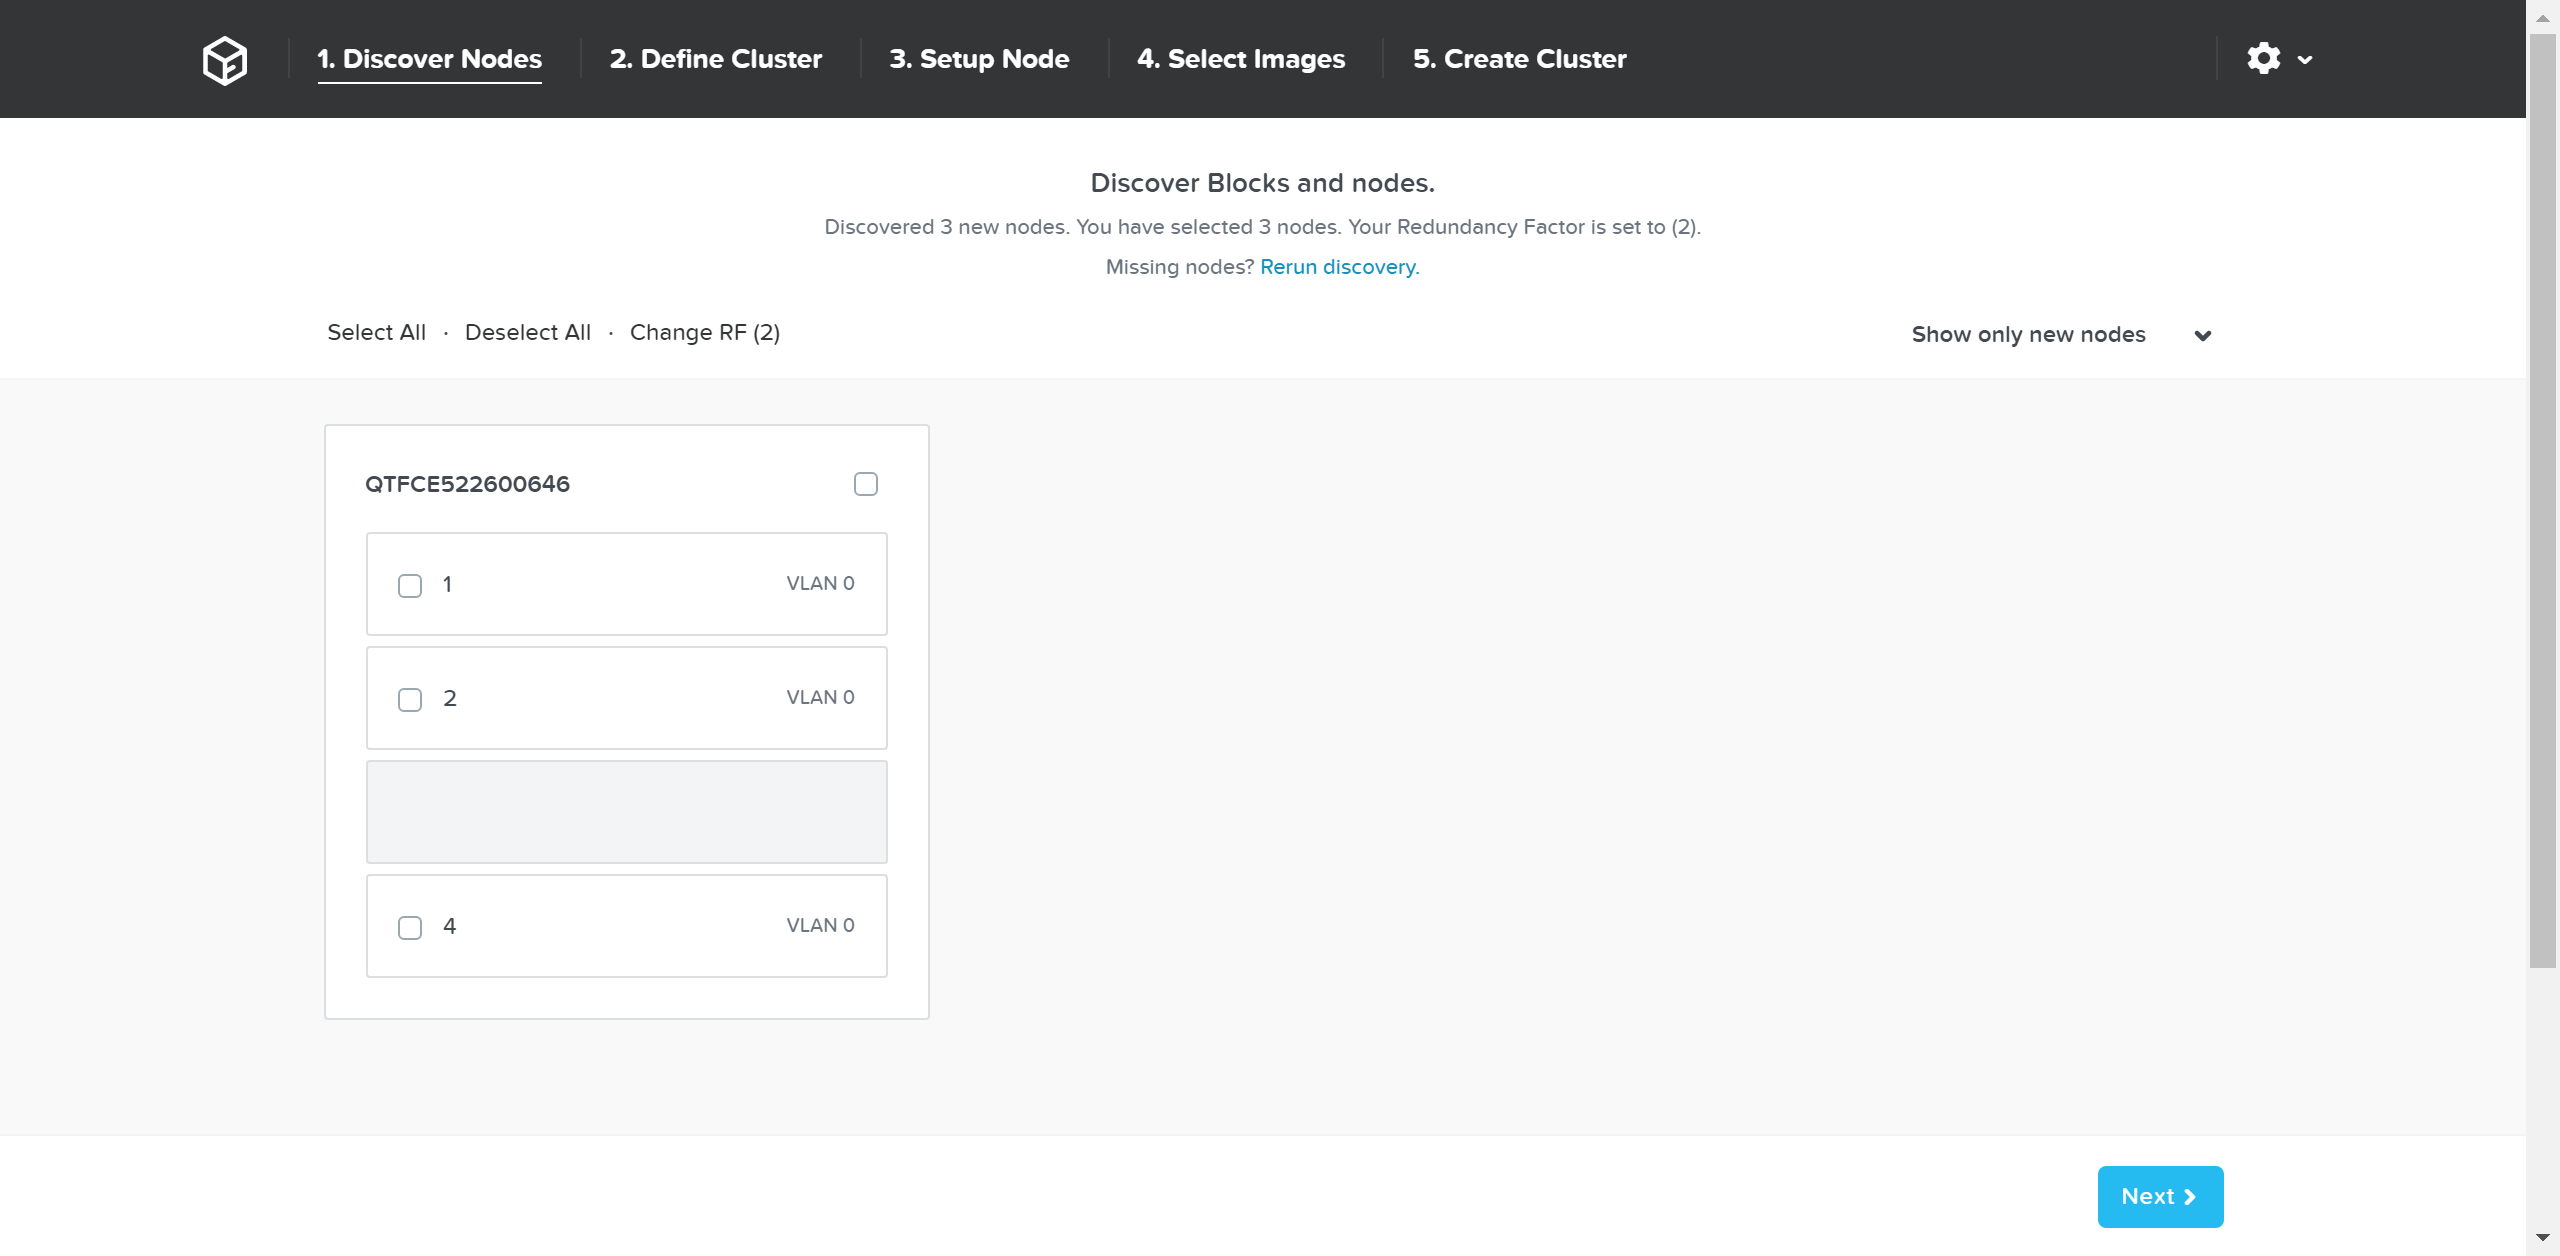
This will show all of the discovered nodes and their chassis. Select the desired nodes to form the cluster and click ‘Next’
 Foundation - Node Selection
The next page prompts for the cluster and network inputs:
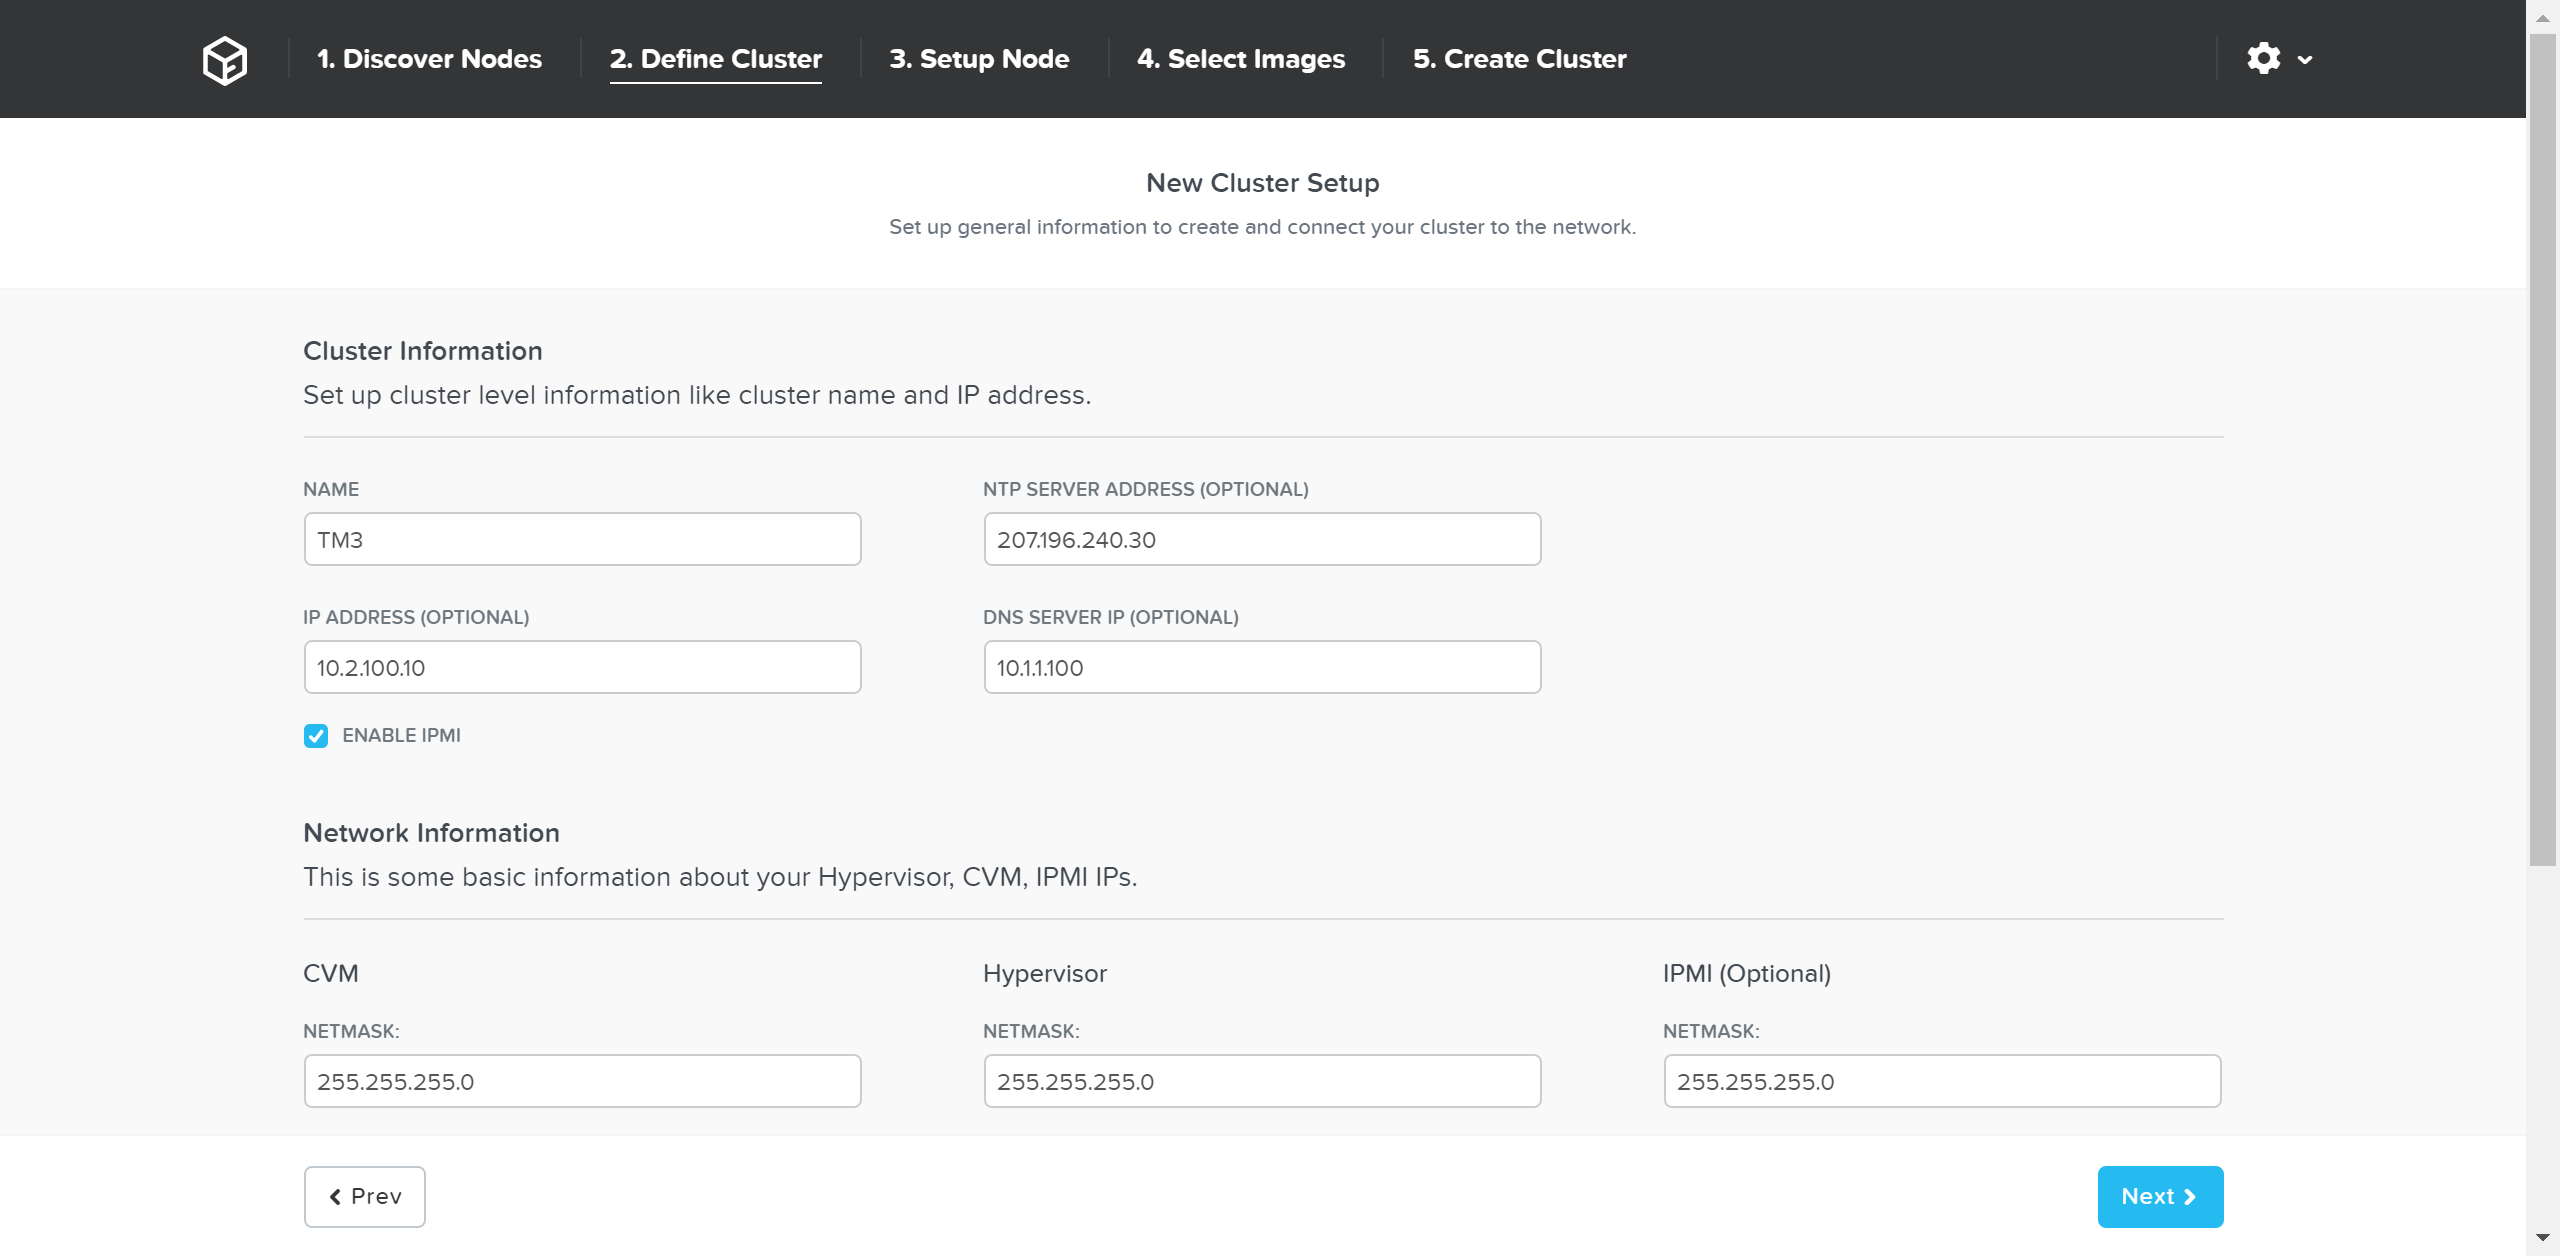 Foundation - Cluster Information
 Foundation - Network Information
Once the details have been input, click ‘Next’
Next we’ll input the node details and IP addresses:
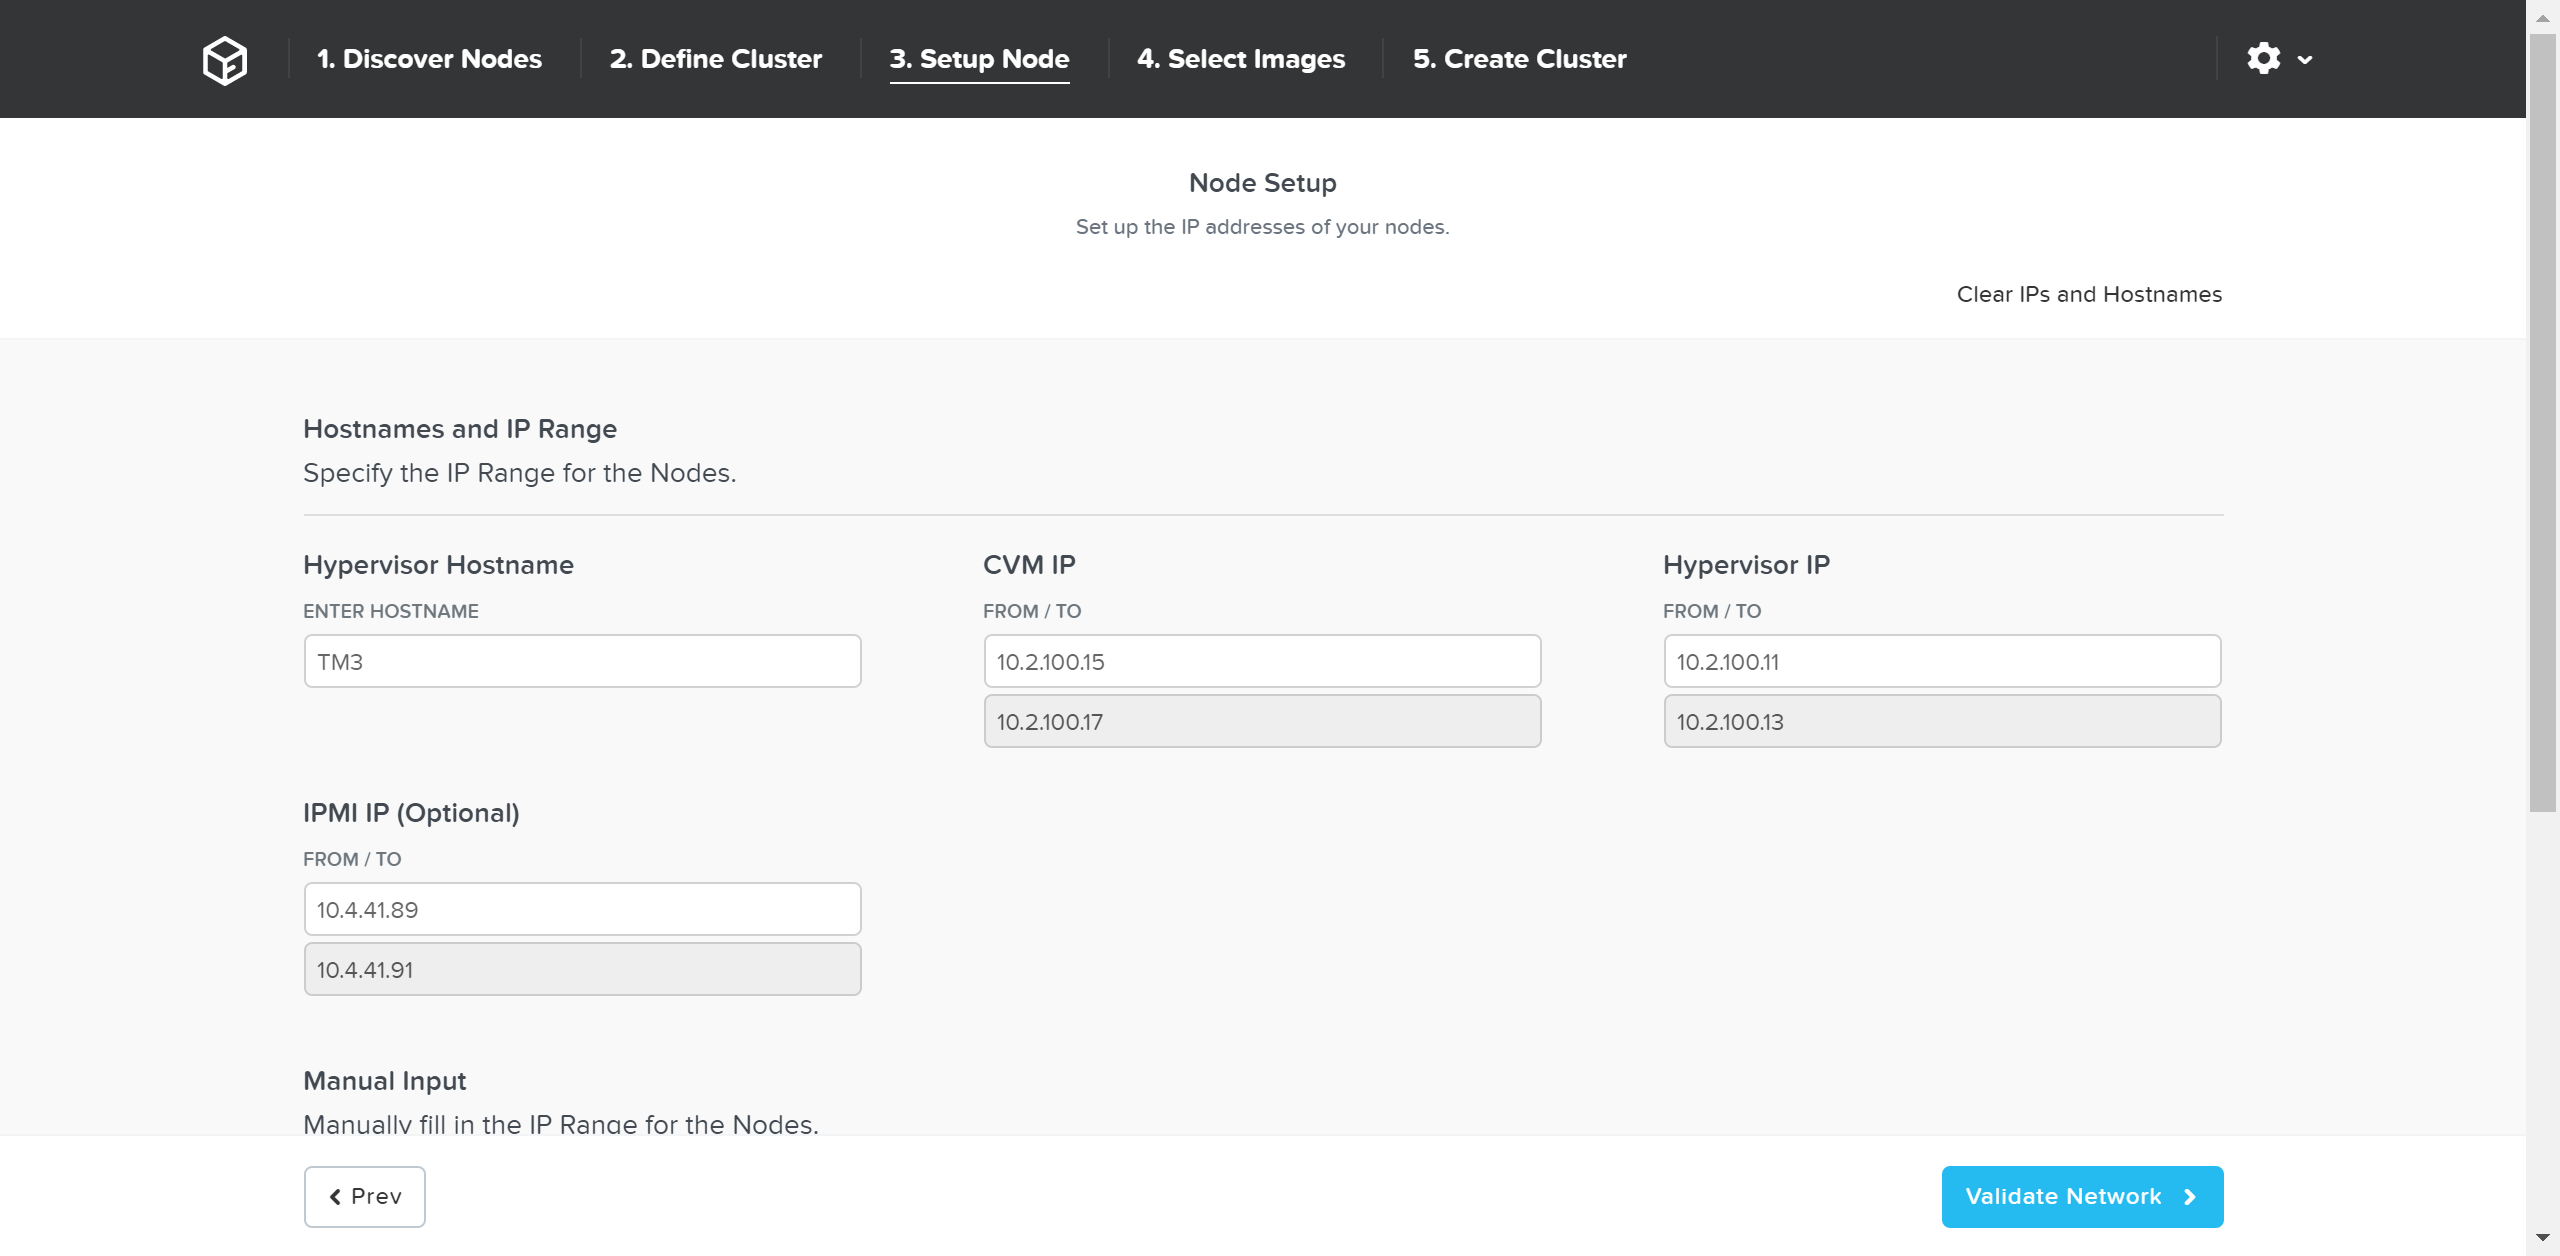 Foundation - Node Setup
You can manually override the hostname and IP addresses if necessary:
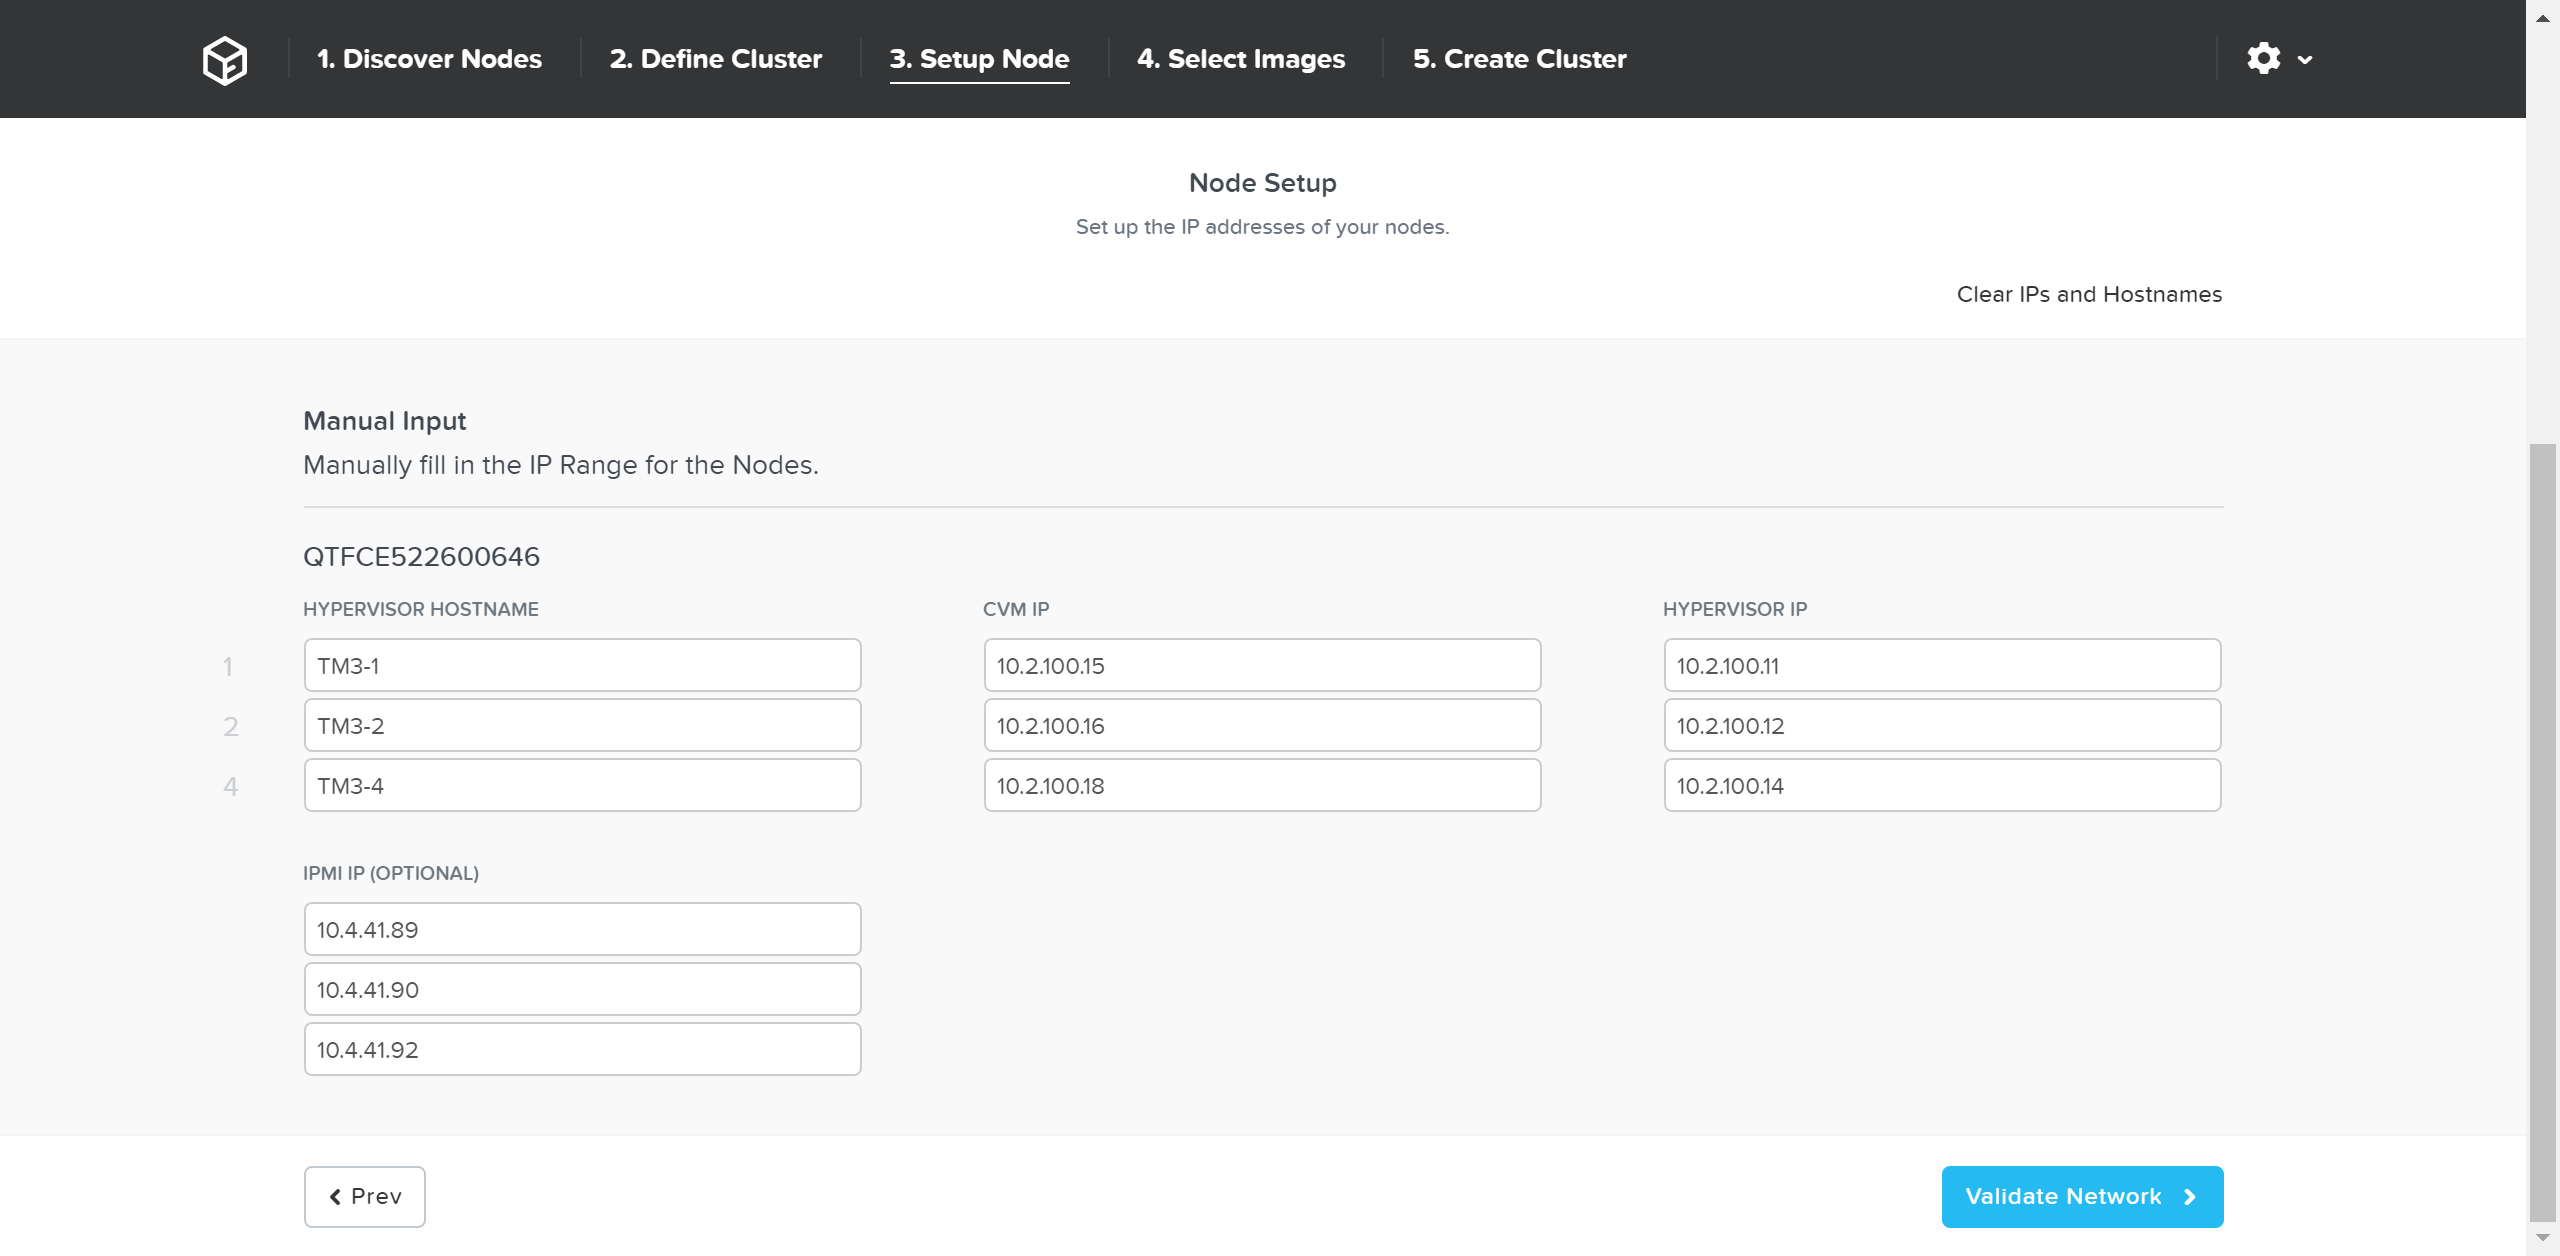 Foundation - Hostname and IP
Click ‘Validate Network’ to validate network configuration and proceed. This will check for IP address conflicts and ensure connectivity.
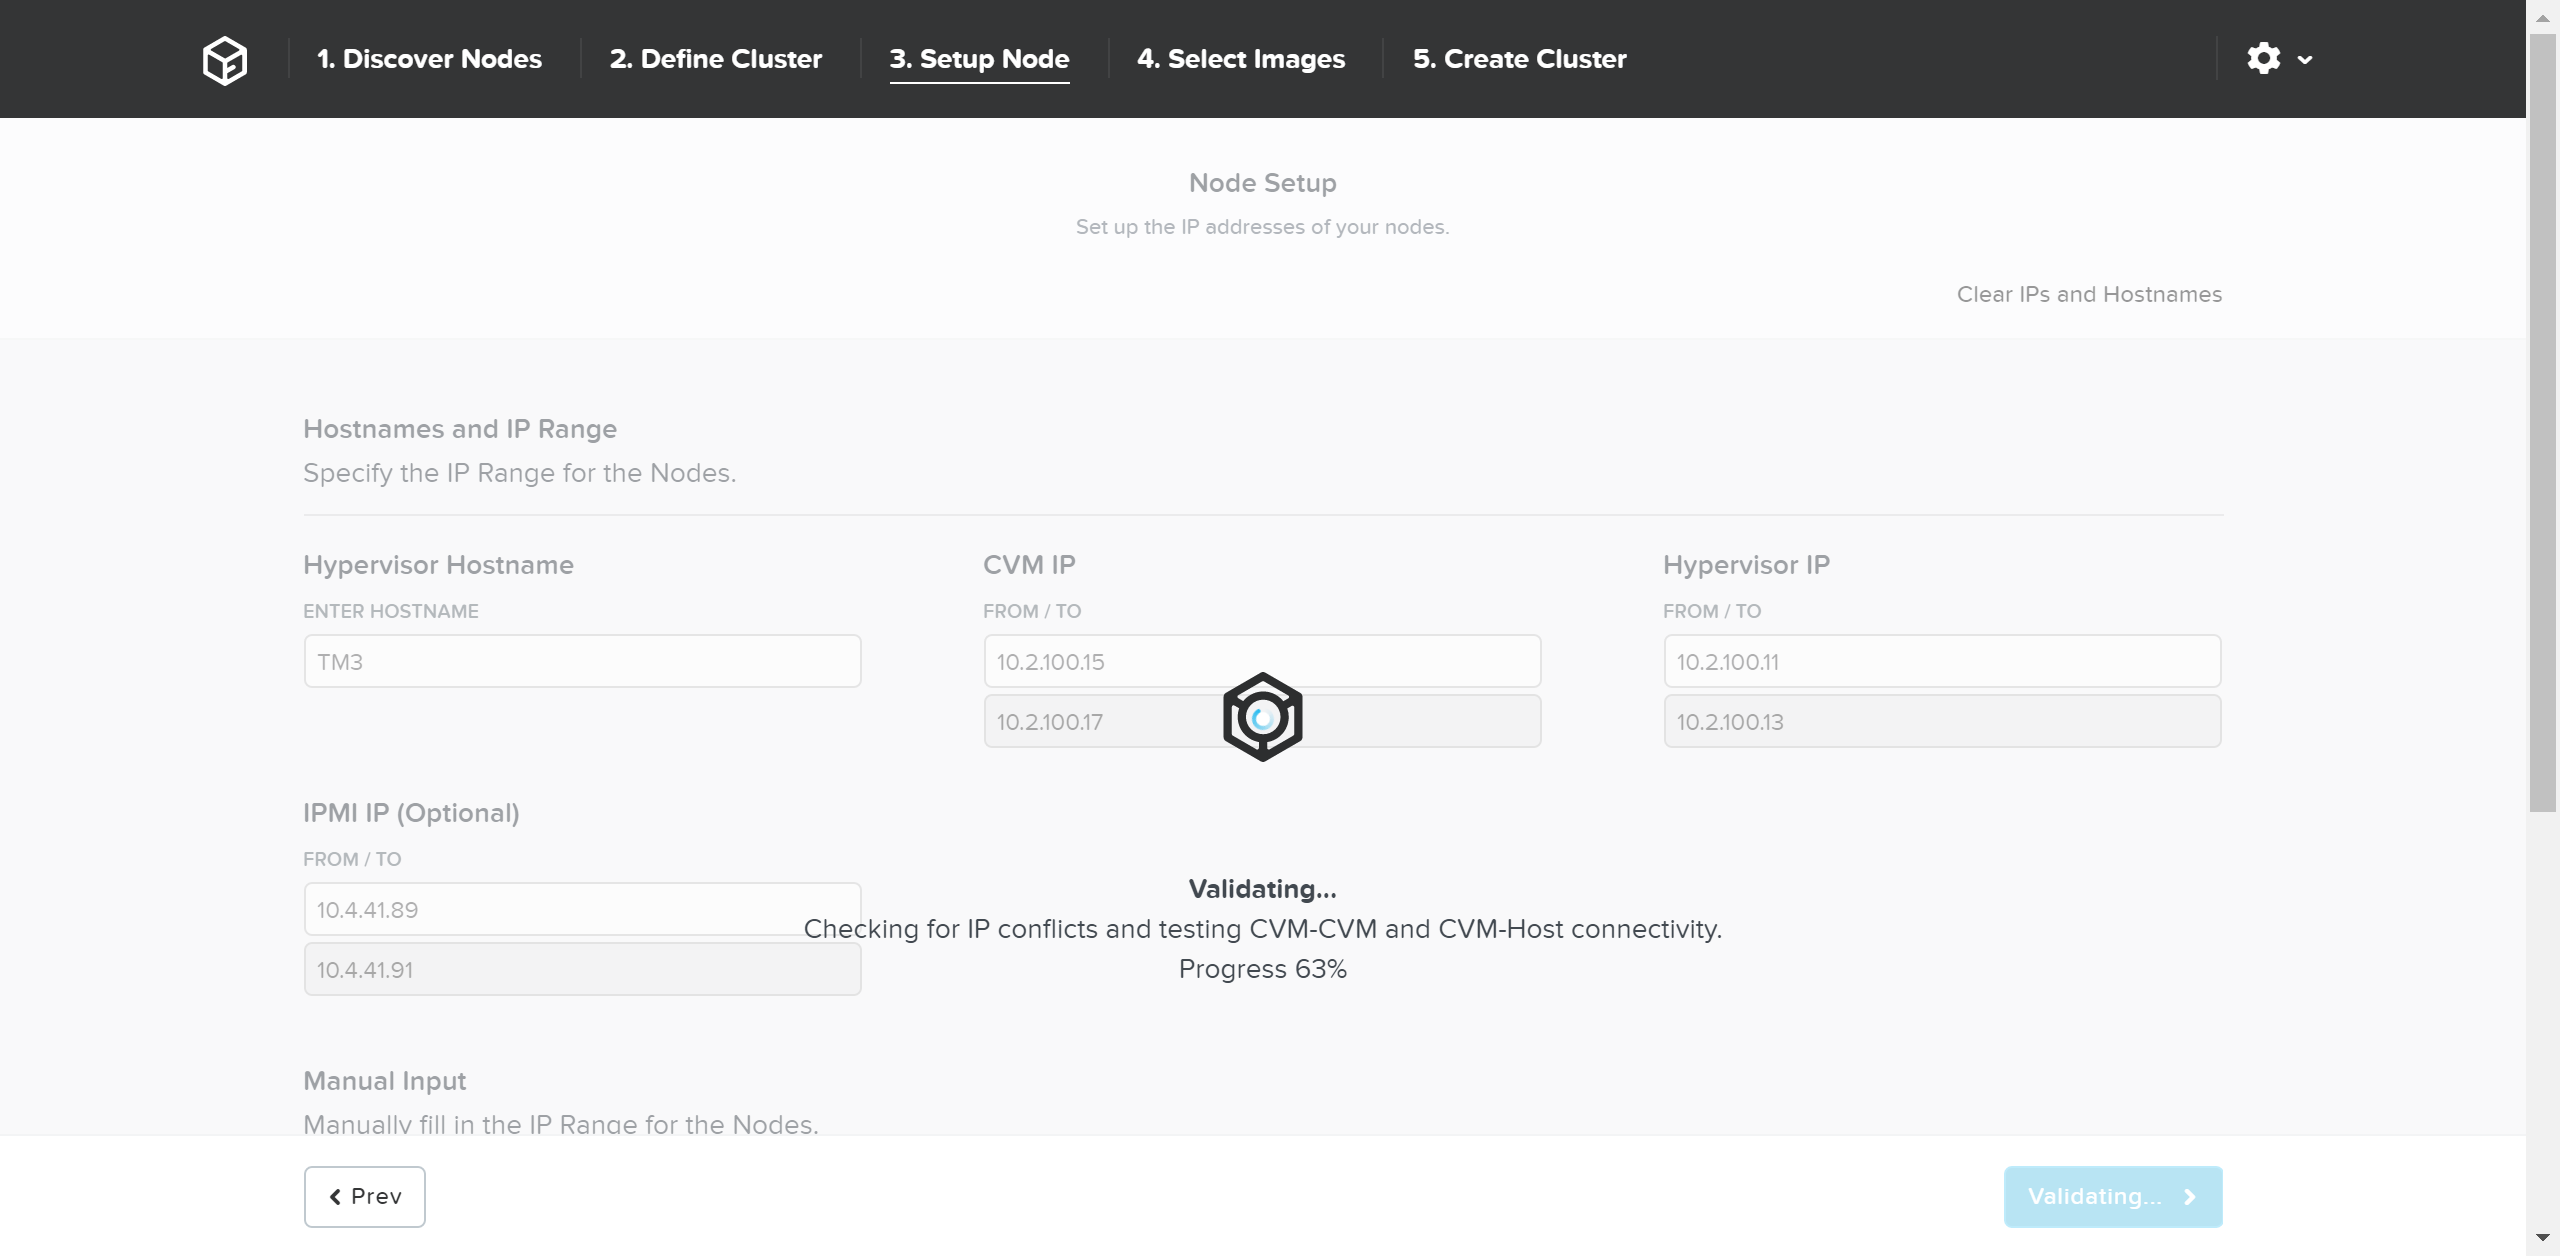 Foundation - Network Validation
Once network validation has completed successfully we’ll now proceed to selecting the desired images.
To upgrade AOS to a newer version than currently on the CVM, download it from the portal and upload the Tarball. Once we have the desired AOS image, we’ll select the hypervisor.
For AHV, the image is built-in to the AOS image. For others you must upload the desired hypervisor image. NOTE: make sure the AOS and hypervisor versions are on the compatibility matrix (LINK).
Once we have the desired images, click ‘Create’:
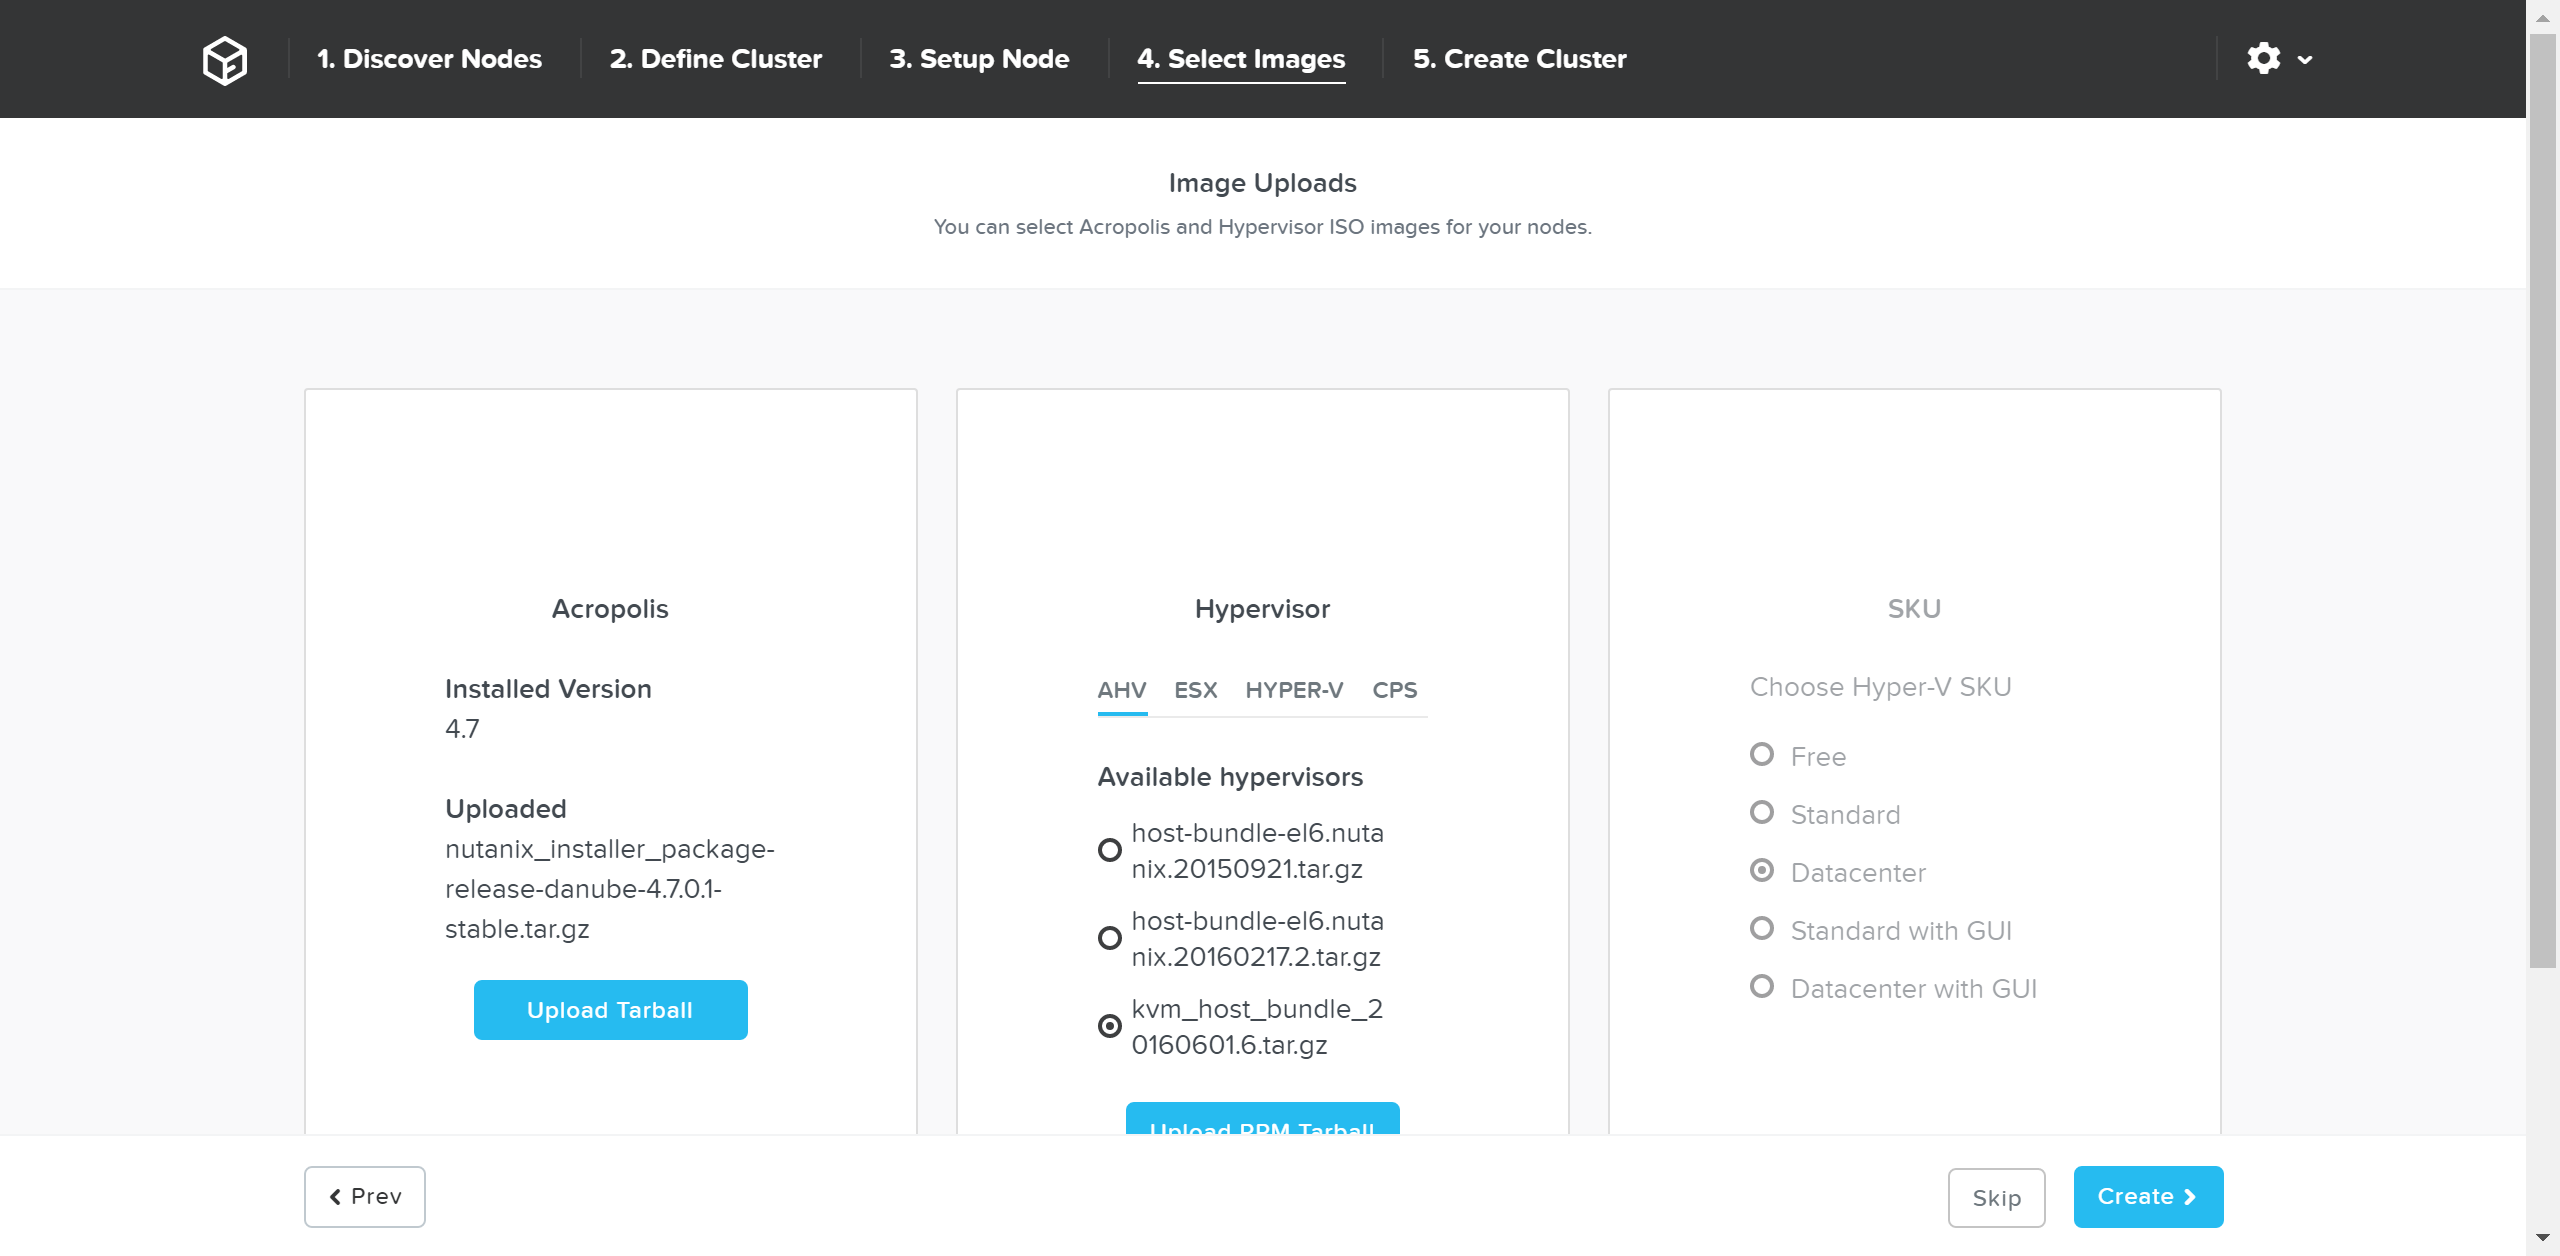 Foundation - Select Images
If imaging is not necessary you can also click ‘Skip’ to skip the imaging process. This will not re-image the hypervisor or Nutanix cluster, but just configure the cluster (e.g. IP addresses, etc.).
Foundation will then proceed with the imaging (if necessary) and cluster creation process.
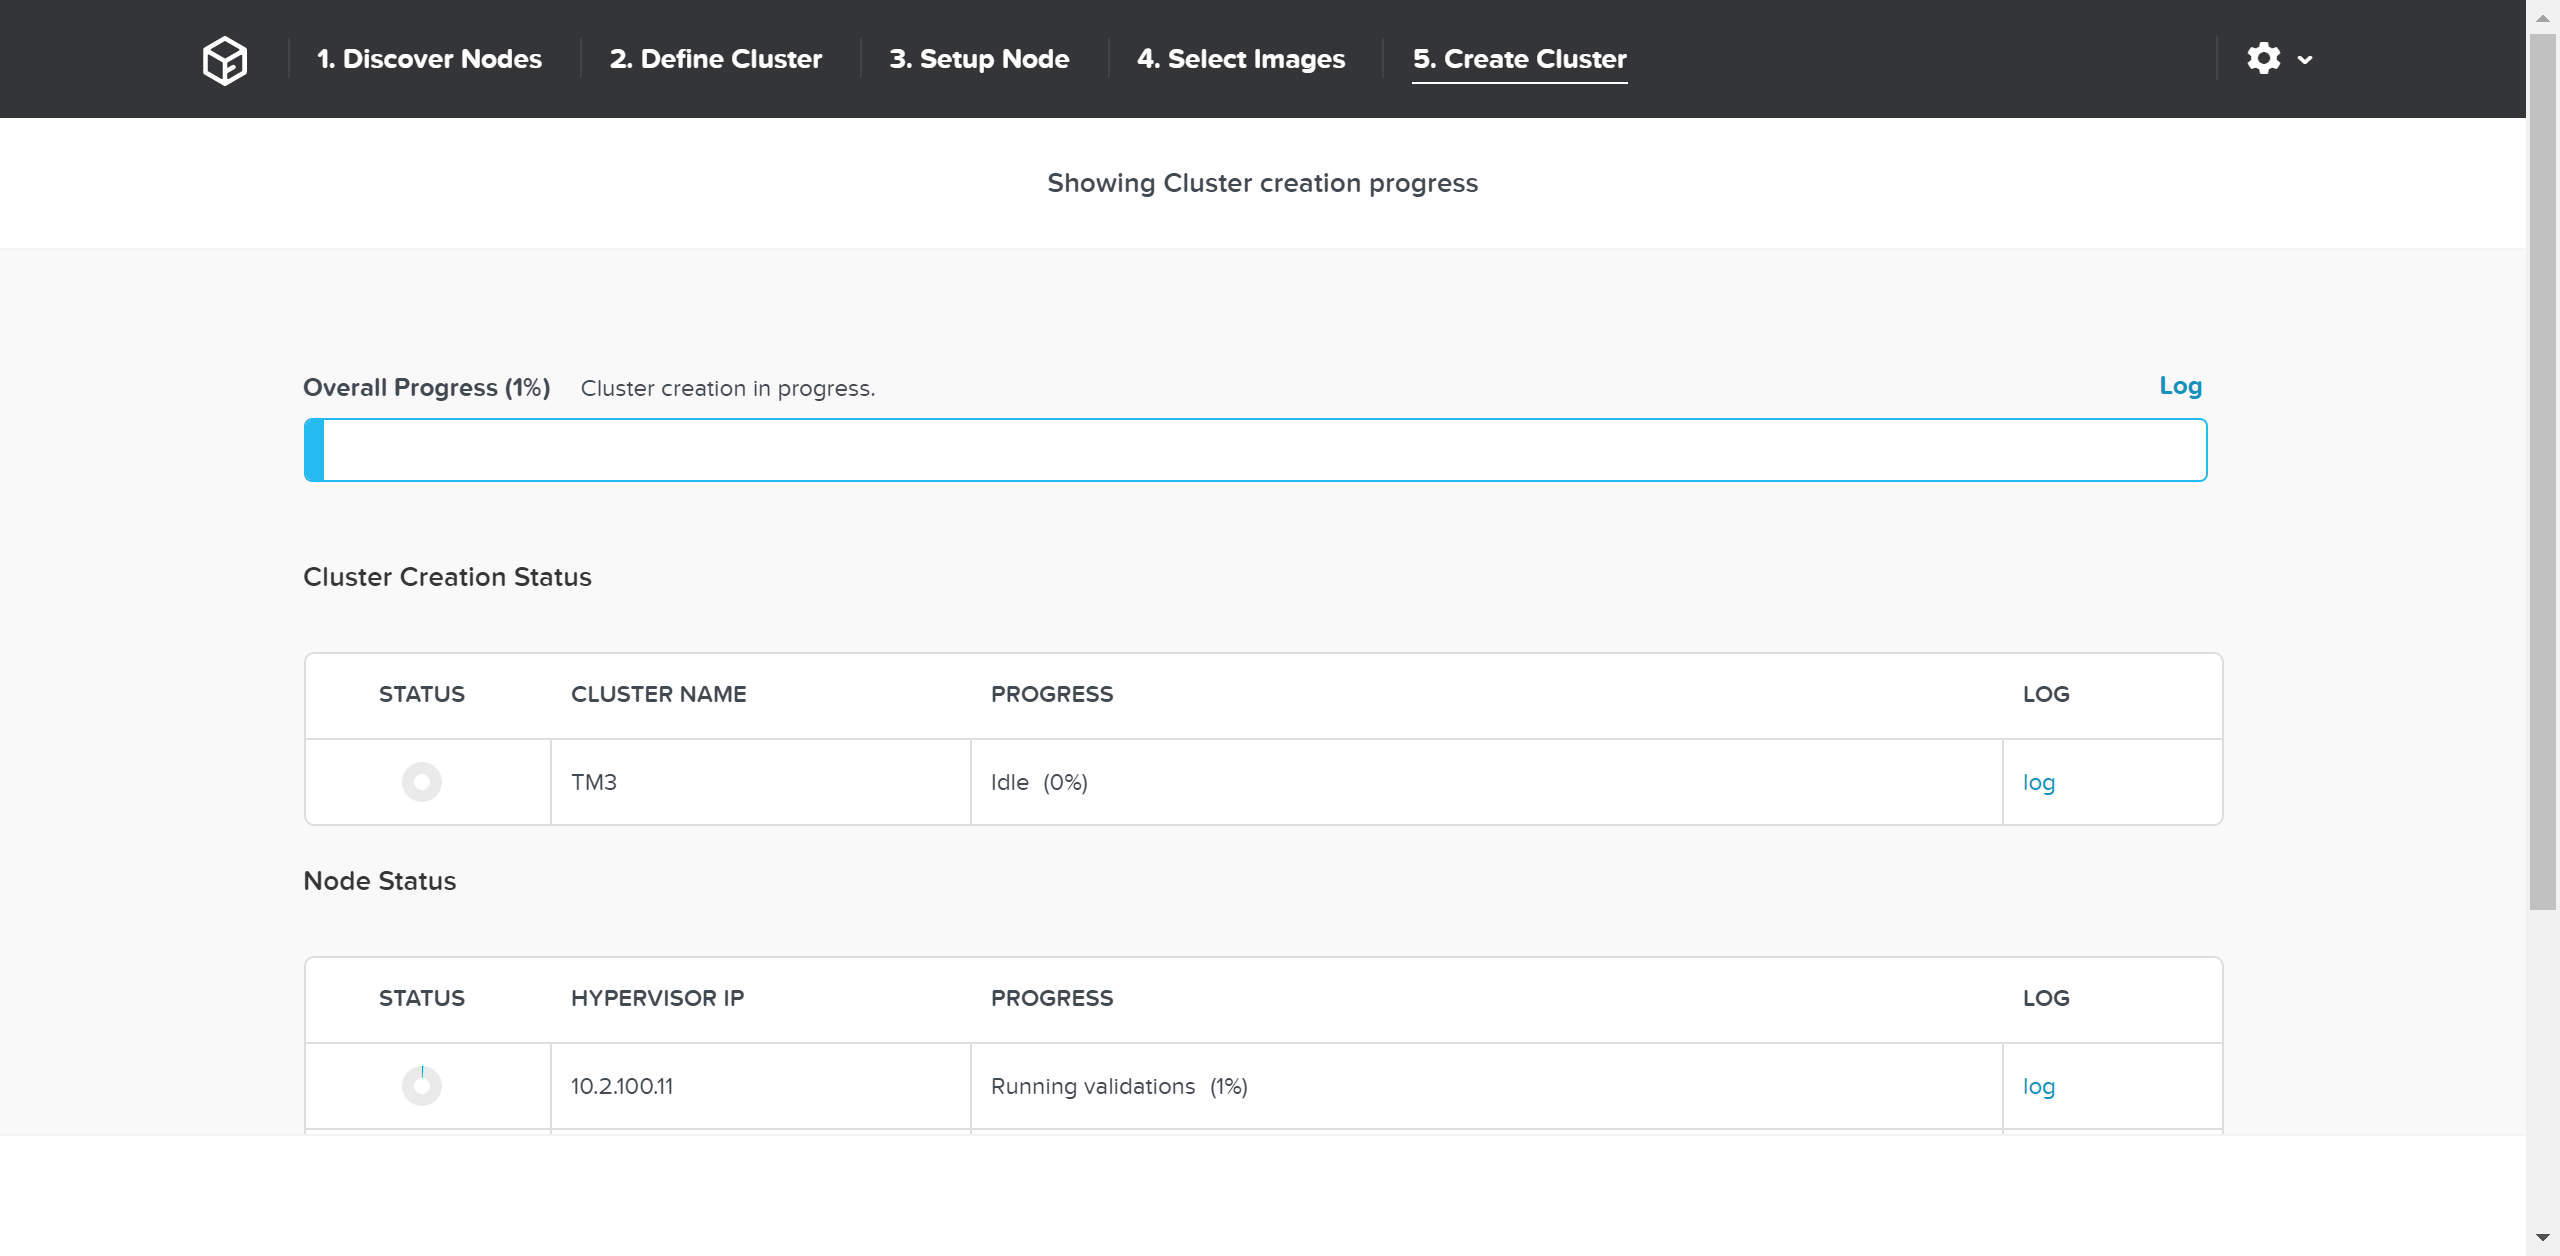 Foundation - Cluster Creation Process
Once the creation is successful you’ll get a completion screen:
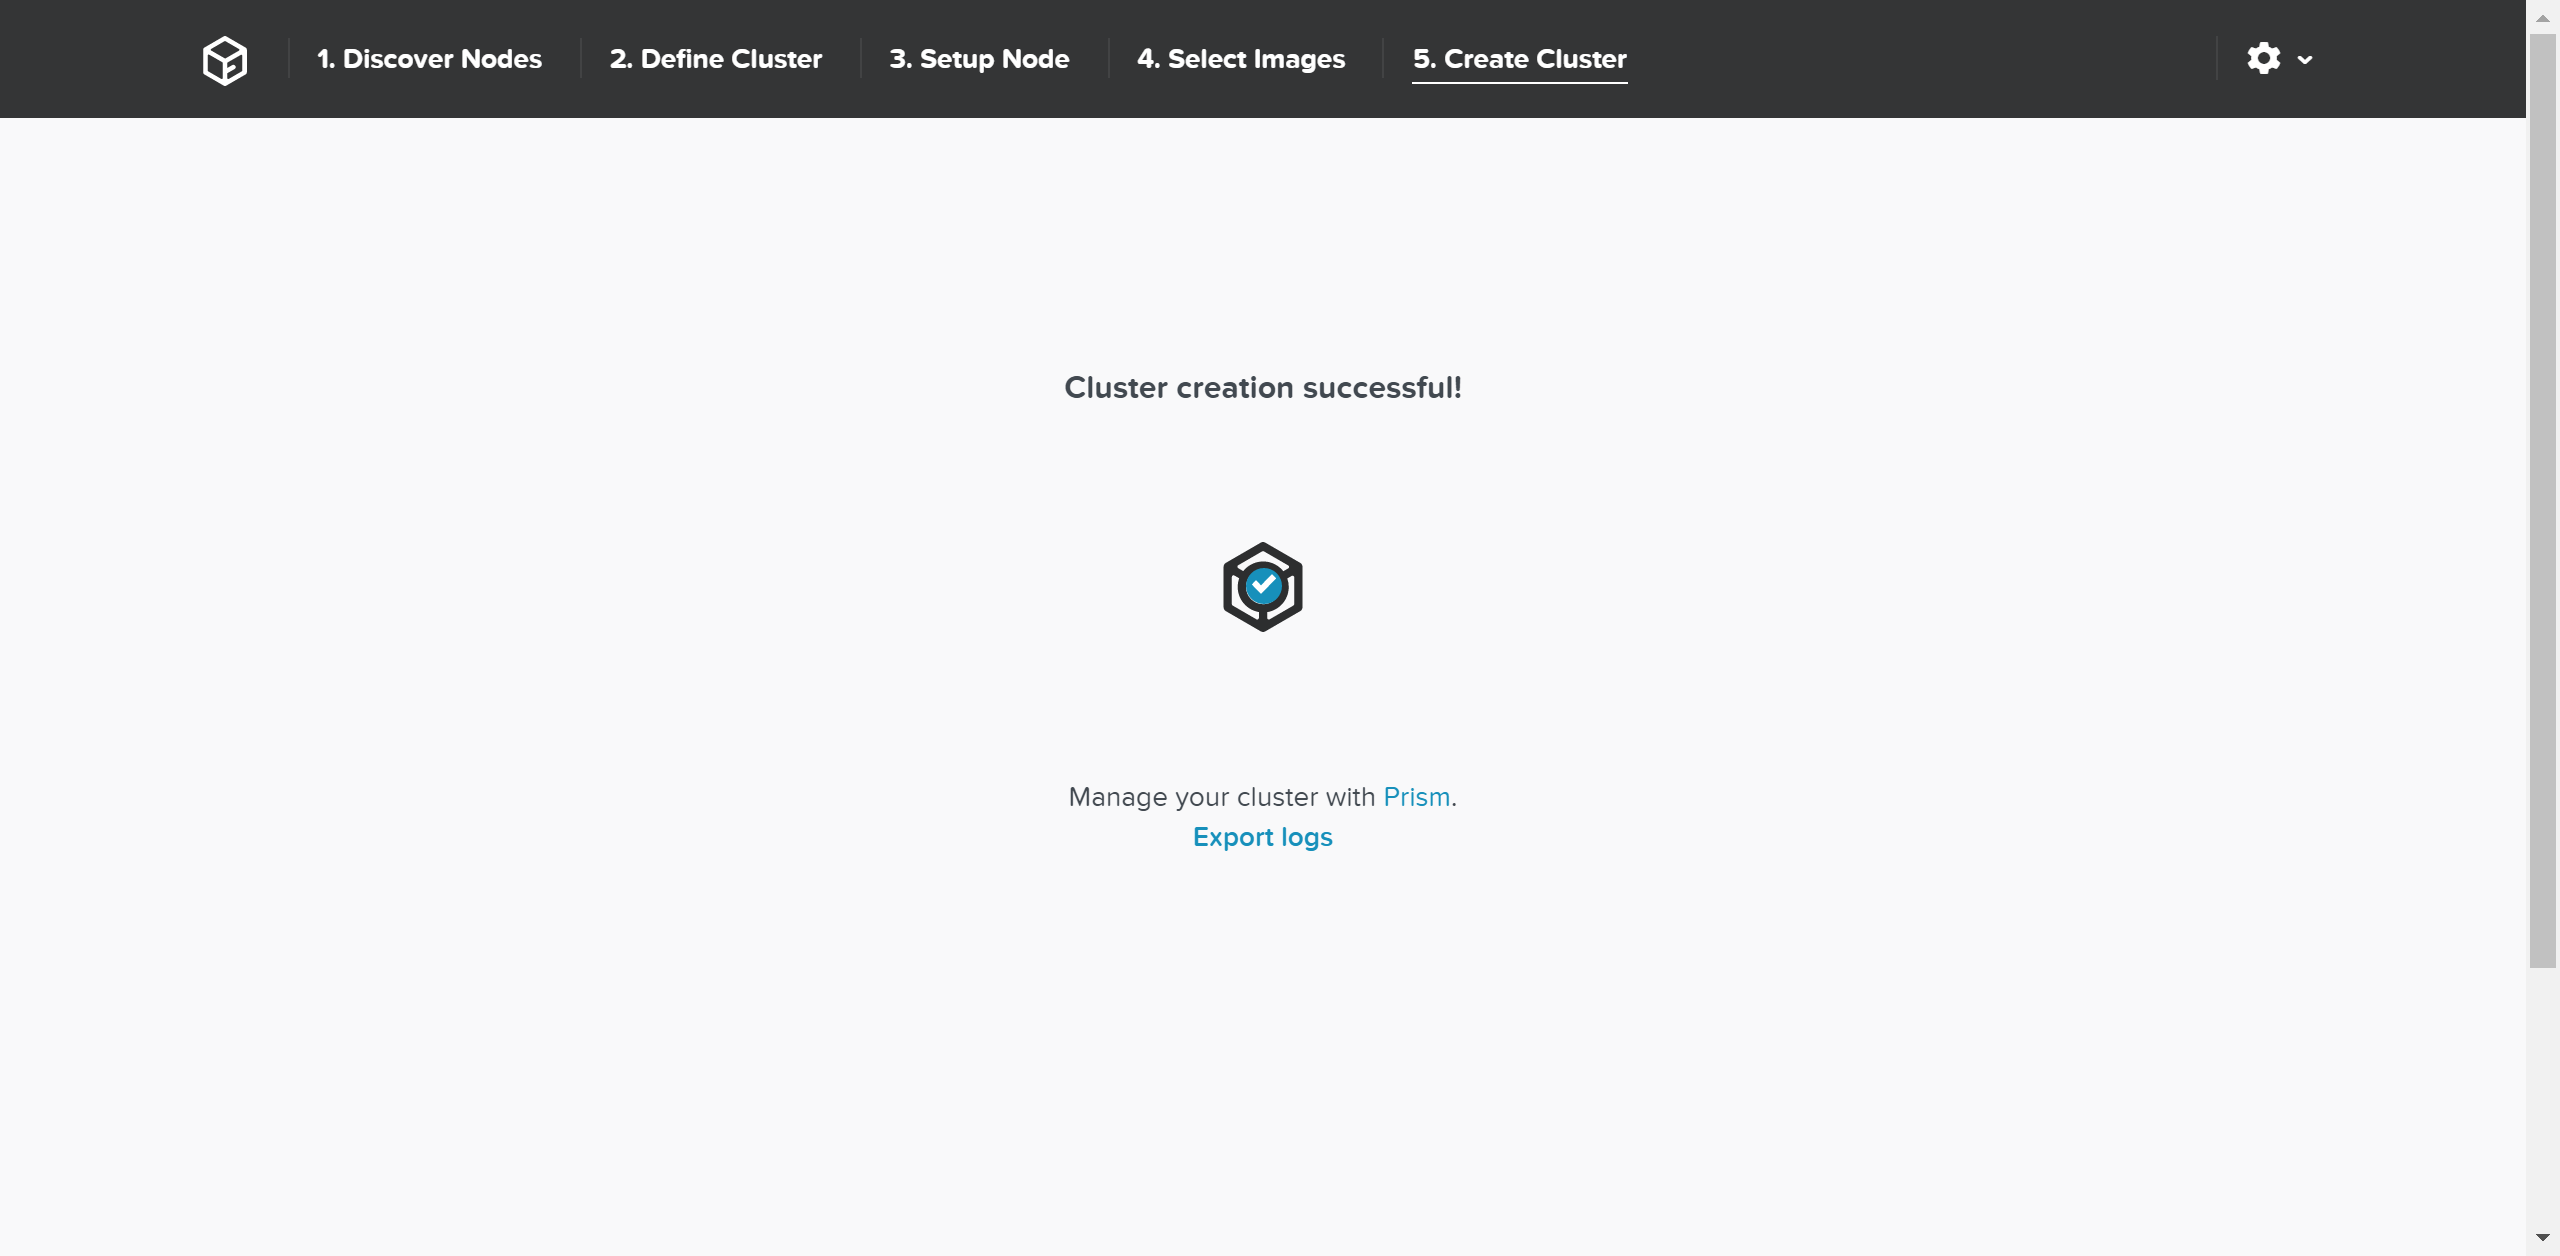 Foundation - Cluster Creation Complete
At this point you can now log into any CVM or the Cluster IP and start using the Nutanix platform!
©2025 Nutanix, Inc. All rights reserved. Nutanix, the Nutanix logo and all Nutanix product and service names mentioned are registered trademarks or trademarks of Nutanix, Inc. in the United States and other countries. All other brand names mentioned are for identification purposes only and may be the trademarks of their respective holder(s).